Are you looking to enhance your natural beauty and achieve a flawlessly sculpted face? Look no further than the world of face contouring! This innovative technique has taken the beauty industry by storm, offering a simple yet effective way to define your features and achieve that coveted chiseled look. Whether you want to add definition to your cheekbones, slim down your nose, or create a more defined jawline, face contouring allows you to effortlessly transform your appearance and highlight your best features. So, if you’re ready to take your makeup game to the next level, grab your brushes and get ready to master the art of face contouring!

Understanding Face Contouring
What is Face Contouring?
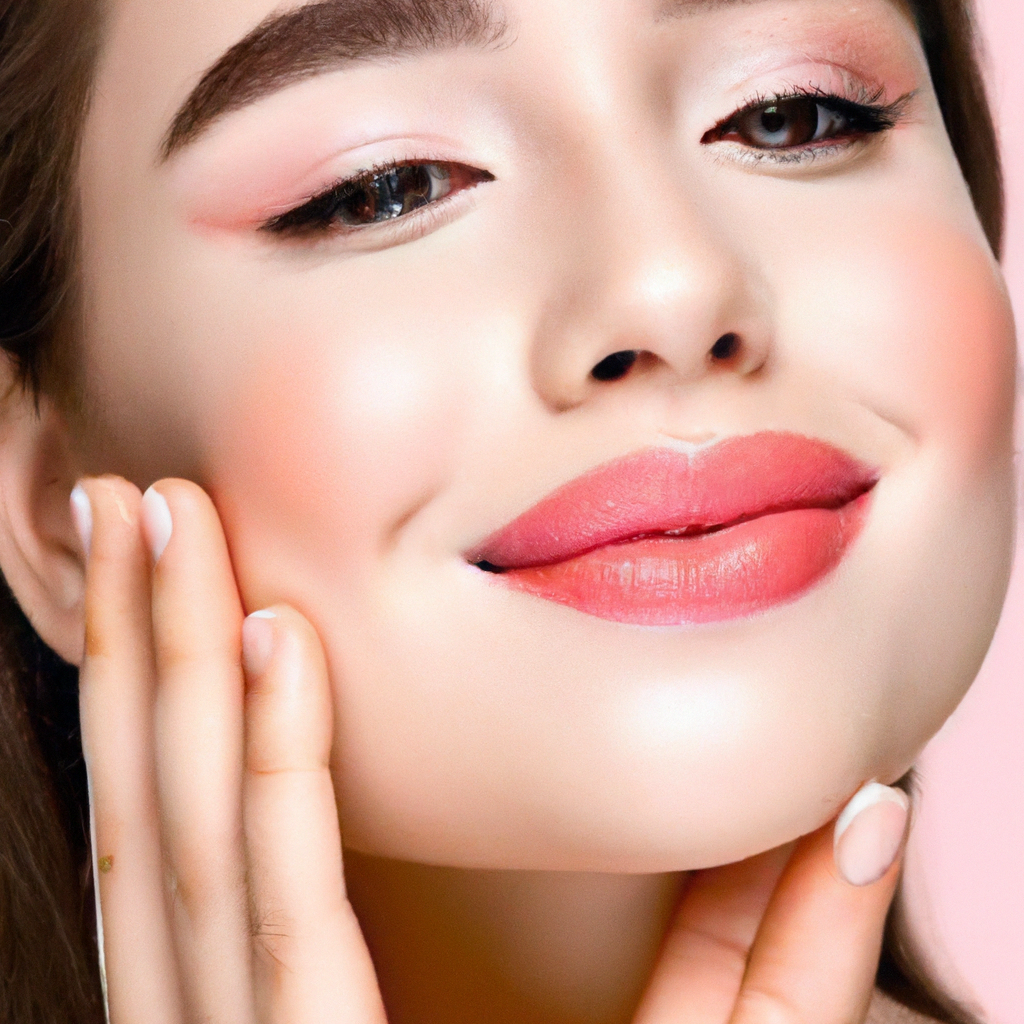
Face contouring is a makeup technique that involves using darker and lighter shades of makeup to enhance and define the natural contours of the face. By strategically applying these shades, you can create the illusion of a more sculpted and structured face shape. Contouring is a popular trend in the beauty world, as it allows you to highlight your best features and minimize any areas you may wish to downplay.
History of Face Contouring
The concept of face contouring dates back to ancient civilizations. Egyptians, Greeks, and Romans used various makeup techniques to enhance their facial features. However, face contouring as we know it today became popularized in the 1920s, during the golden era of Hollywood. Film stars like Marlene Dietrich and Greta Garbo relied on contouring to create dramatic and glamorous looks on the silver screen. Since then, contouring has evolved and become a staple in the makeup routines of people all over the world.
The Science Behind Face Contouring
The science behind face contouring lies in the principles of light and shadow. By strategically applying darker shades in areas you wish to create the illusion of depth, such as the hollows of the cheeks or the sides of the nose, you can make those areas appear more sunken or slim. On the other hand, highlighting with lighter shades brings forward the areas you want to emphasize, such as the cheekbones or the brow bone. By playing with these contrasting shades, you can create a three-dimensional effect and enhance the natural structure of your face.
Determining Your Face Shape
Importance of Face Shape
Understanding your face shape is crucial in face contouring as it helps you determine which areas to emphasize and which to minimize. Different face shapes require different contouring techniques to achieve the most flattering results. By identifying your face shape, you can tailor your contouring routine to enhance your unique features and create a balanced and harmonious look.
Identifying Your Face Shape
To determine your face shape, analyze your jawline, cheekbones, and forehead. The main face shapes include round, oval, square, and heart-shaped. Round faces have soft, curved jawlines and an equal width and length. Oval faces have balanced proportions and softly rounded jawlines. Square faces have strong, angular jawlines and a wide forehead. Heart-shaped faces have a narrow, pointed chin and wider forehead.
Popular Face Shapes
Some of the most popular face shapes are:
-
Round Faces: Contouring for round faces focuses on adding definition to the cheeks and slimming the face. This is achieved by applying contouring products in the hollows of the cheeks and along the hairline, while highlighting the center of the forehead and the chin.
-
Oval Faces: Contouring for oval faces aims to enhance the natural balance and symmetry of the face. The focus is on highlighting the cheekbones and brow bone, while softly contouring the forehead and jawline to create a more sculpted appearance.
-
Square Faces: Contouring for square faces aims to soften the strong angles of the face. This is achieved by contouring the temples, jawline, and sides of the forehead, while highlighting the center of the face, such as the cheekbones and the bridge of the nose.
-
Heart-shaped Faces: Contouring for heart-shaped faces focuses on minimizing the width of the forehead and enhancing the jawline. Contouring products are applied to the temples and sides of the forehead, while highlighting the center of the face and the chin to create a more balanced look.
Essential Tools for Face Contouring
The Right Makeup Brushes
Having the right makeup brushes is essential for achieving a flawless contour. Different brushes are designed for specific areas of the face, allowing for precise application and seamless blending. The most commonly used brushes for contouring include an angled brush for sculpting the cheeks, a small tapered brush for defining the nose, and a fluffy brush for blending.
Choosing the Perfect Contouring Product
Choosing the right contouring product is crucial for achieving natural-looking results. Opt for a contour shade that is a few shades darker than your skin tone and has a matte finish. Cream and powder formulas are the most popular options, with cream being more beginner-friendly and powder providing a more lightweight and buildable finish.
Additional Tools and Products
In addition to brushes and contouring products, there are a few extra tools and products that can enhance your contouring routine. A beauty sponge can be used to blend out harsh contour lines and achieve a more seamless finish. Setting powder can help set the contour in place and prevent it from smudging throughout the day. A highlighter is essential for adding a touch of glow to the high points of your face, further enhancing the contoured look.
Preparing Your Face for Contouring
Cleanse and Moisturize
Before starting your contouring routine, it is important to cleanse and moisturize your face to create a smooth canvas. Cleanse your face using a gentle cleanser to remove any dirt or excess oil. Follow up with a moisturizer that suits your skin type to hydrate and nourish the skin, ensuring a flawless base for your contouring products.
Apply a Primer
Applying a primer helps create a smooth and even surface for your contouring products. Choose a primer that is suitable for your skin type, whether it be hydrating for dry skin or mattifying for oily skin. Apply a thin layer of primer all over your face, focusing on areas where your contouring will be applied.
Foundation Matching
After priming, it’s time to apply foundation. Choose a foundation shade that matches your skin tone for a seamless and natural finish. Apply foundation evenly all over your face, blending it into your neck for a cohesive look. The foundation acts as the base for your contouring, ensuring a smooth transition between the contoured areas and the rest of your face.

Contouring Techniques for Different Face Shapes
Contouring for Round Faces
Contouring for round faces involves creating the illusion of length and definition. To achieve this, contour the hollows of your cheeks by applying a contour shade in a diagonal line from the center of your ear towards the corners of your lips. Blend the contour shade thoroughly to avoid any harsh lines. Contour the sides of your forehead and along your jawline to further enhance the slimming effect. Finally, highlight the center of your forehead, the bridge of your nose, and the chin to bring forward those areas.
Contouring for Oval Faces
Contouring for oval faces focuses on enhancing the natural shape of the face while adding definition. Apply contour shade beneath the cheekbones, starting from the center of the ear and blending towards the corners of the lips. Blend the contour shade upwards towards the temples to create a lifting effect. Contour the sides of the forehead and along the jawline to create a more sculpted appearance. Highlight the center of the forehead, the cheekbones, and the bridge of the nose to bring forward those features.
Contouring for Square Faces
Contouring for square faces aims to soften the strong angles and create a more rounded appearance. Apply contour shade along the hairline, starting from the temples and blending towards the center of the forehead. Contour the hollows of the cheeks by applying the contour shade in a diagonal line from the center of the ears towards the corners of the lips. Blend the contour shade towards the jawline to create a more defined look. Highlight the center of the forehead, the cheekbones, and the bridge of the nose to bring those features forward.
Contouring for Heart-shaped Faces
Contouring for heart-shaped faces focuses on minimizing the width of the forehead and enhancing the jawline. Apply contour shade to the temples and the sides of the forehead, blending towards the center. Contour the hollows of the cheeks by applying the contour shade in a diagonal line towards the corners of the lips. Blend the contour shade towards the jawline to create a more balanced appearance. Highlight the center of the forehead, the cheekbones, and the chin to bring focus to those areas.
Highlighting and Contouring
The Purpose of Highlighting
Highlighting is an essential step in face contouring as it adds dimension and luminosity to the high points of the face. Highlighter is applied to areas you want to bring forward and enhance, such as the cheekbones, brow bone, bridge of the nose, and cupid’s bow. By adding a touch of shimmer or glow, highlighting creates a more youthful and radiant look.
The Importance of Shade Selection
When choosing a highlighter shade, opt for one that complements your skin tone. Champagne or golden shades work well for warm undertones, while silver or icy shades are suited for cool undertones. Apply the highlighter using a small fluffy brush or a fan brush for a precise and controlled application. Remember to blend the highlighter well to avoid any visible lines and achieve a seamless glow.
The Art of Blending
Blending is key to achieving a natural-looking contour and highlight. Use a clean brush or a beauty sponge to blend the contour and highlight shades together, creating a seamless transition between the two. Avoid using too much pressure and blend in upward motions for a lifted effect. Take your time and ensure that there are no harsh lines, as a well-blended contour and highlight will create a more polished and professional finish.
Step-by-Step Guide to Face Contouring
Step 1: Contour the Cheekbones
Take your contour shade and apply it to the hollows of your cheeks, starting from the center of your ear and blending towards the corners of your lips. Use a small angled brush for precise application and a fluffy brush to blend the contour shade for a seamless finish. Remember to blend upwards towards the temples to create a lifting effect.
Step 2: Define the Jawline
To define your jawline, apply contour shade along the jawbone, starting from the ears and blending towards the chin. This will create a more sculpted and defined jawline. Use a fluffy brush to blend the contour shade thoroughly, ensuring there are no harsh lines.
Step 3: Sculpt the Nose
To sculpt the nose, apply a small amount of contour shade on the sides of your nose. Starting from the eyebrow, blend the contour shade towards the tip of the nose. Use a small tapered brush for precise application and a fluffy brush to blend the contour shade to create a natural-looking shadow.
Step 4: Shape the Forehead
To shape the forehead, apply contour shade along the hairline, starting from the temples and blending towards the center of the forehead. This will create a softer and more balanced appearance. Blend the contour shade thoroughly using a fluffy brush, ensuring a seamless transition between the contour and the rest of the face.
Step 5: Enhance the Chin
Enhancing the chin helps create balance and definition. Apply contour shade to the area beneath the chin, starting from the sides and blending towards the center. Use a fluffy brush to blend the contour shade for a natural and well-defined chin.
Step 6: Highlight the High Points
Highlighting the high points of your face adds luminosity and glow. Apply a small amount of highlighter to the top of your cheekbones, the brow bone, the bridge of your nose, and the cupid’s bow. Gently blend the highlighter using a small fluffy brush or your fingertips for a seamless and radiant finish.
Avoiding Common Contouring Mistakes
Using Too Much Product
One common mistake in face contouring is using too much product, which can result in a heavy and unnatural appearance. Remember that less is more when it comes to contouring. Start with a small amount of product and build it up gradually, blending as you go to achieve your desired intensity.
Not Blending Properly
Proper blending is essential for a seamless and natural-looking contour. Take your time and blend the contour shade and highlighter thoroughly, ensuring there are no visible lines or harsh edges. Use a clean brush or a beauty sponge to achieve a well-blended finish.
Choosing the Wrong Shade
Choosing the wrong shade for your contour or highlight can result in an unflattering finish. Opt for a contour shade that is a few shades darker than your skin tone and has a matte finish. For highlighter, choose a shade that complements your skin tone and has a subtle shimmer or glow. Swatch and test the shades beforehand to find the perfect matches for your complexion.
Overlooking Lighting Conditions
Lighting conditions can greatly affect the appearance of your contour and highlight. It is important to consider the lighting you will be in throughout the day and adjust your contouring accordingly. Natural light is the most accurate representation of how your makeup will look, so try to apply and assess your contouring in natural daylight whenever possible.
Setting and Finishing the Contoured Look
Setting Powder and Spray
To set your contouring in place and prolong its longevity, apply a light dusting of setting powder all over your face. Use a fluffy brush to ensure an even application. Setting powder will help prevent any smudging or transferring of the contour and highlight products. For added longevity, you can also use a setting spray to lock everything in place.
Applying Blush
Blush adds a pop of color and liveliness to the face. After contouring and highlighting, apply blush to the apples of your cheeks using a blush brush. Choose a blush shade that complements your skin tone and apply it in a gentle sweeping motion. Blend the blush towards the temples for a natural and flushed appearance.
Finishing Touches
To complete your contoured look, finish off with a few additional touches. Fill in your eyebrows to frame your face and complement the enhanced structure. Apply mascara to define and lengthen your lashes. Finally, apply a lip color of your choice to bring focus to your lips. Remember to choose a lip color that complements your overall makeup look.
Experimenting and Customizing
Playing with Different Shades
Face contouring allows for endless possibilities and customization. Feel free to experiment with different shades of contour and highlight to find the ones that suit your skin tone and desired look. You can also mix different shades together to create a customized contouring shade that matches your unique complexion.
Trying Various Contouring Techniques
Contouring techniques can vary depending on personal preference and desired results. Don’t be afraid to try different techniques to enhance different areas of your face. Whether you prefer a more dramatic contour or a subtle enhancement, there are no rules when it comes to face contouring. It’s all about finding what works best for you and accentuates your natural beauty.
Personalizing Your Contouring Routine
Each person’s face shape and features are unique, so it’s important to personalize your contouring routine to suit your specific needs. Pay attention to the areas you want to enhance and those you wish to downplay, and adjust your contour and highlight accordingly. With practice and experimentation, you will develop a contouring routine that enhances your best features and allows you to feel confident and beautiful.

